
- All
- Product Name
- Product Keyword
- Product Model
- Product Summary
- Product Description
- Multi Field Search

A replacement bucket tooth may look right and still fail to fit the existing adapter. For distributors, importers and maintenance teams, useful measurements must describe both the connection and where each reading was taken.
To measure bucket teeth, identify the tooth system, establish clear reference points, then record pocket dimensions and pin-hole size and position. Compare these measurements with the correct drawing or confirmed sample, alongside adapter and retention details.
This guide explains how to prepare bucket teeth measurements that help suppliers assess replacement options.
Start by photographing markings on the tooth, adapter, pin and retainer. Record every readable character, including suffixes, and note whether the sample is new, worn or repaired.
Identify the mounting arrangement before measuring. A replaceable tip fitted over an adapter requires different checks from a bolt-on one-piece tooth. For the latter, bolt spacing, hole shape, mounting opening and bucket lip thickness become central.
This article focuses on adapter-mounted teeth. Machine model and bucket details provide context, but the actual tooth connection still needs confirmation.
Clean dirt and loose deposits from the pocket and pin-hole area without grinding or altering the mating surfaces. Photograph visible wear, deformation and repairs. If removal is necessary, follow the equipment and tooth-system instructions with the bucket safely supported.
Use calipers for accessible internal and external dimensions, a suitable depth tool for defined internal measurements, and a steel rule for approximate overall size. Record units consistently.
Keep tools aligned with the measurement direction. A precise-looking display does not compensate for tilted jaws, worn contact surfaces or an unclear endpoint.
Define the front as the working-tip direction and the rear as the pocket-opening direction. Label photographs by viewing direction, such as "rear view looking toward the tip."
For each measurement, specify:
The starting reference surface or plane.
The endpoint or feature being measured.
The measurement direction and section location.
Use drawing-defined references where available. Otherwise, agree on a practical reference with the supplier and mark it on a photograph. An irregular cast edge should not automatically be treated as a precision datum.
Dimension letters such as A, B and C only make sense alongside their associated drawing.
Measure pocket width between the internal side surfaces at a specified section. Measure pocket height between the internal upper and lower surfaces, stating whether it is taken at the same section.
Avoid confusing external rear width with internal opening width. Also distinguish measurements across an entrance chamfer from measurements farther inside the pocket.
Where the cavity tapers, readings at different depths may differ. Record the section location rather than reporting a single unexplained "opening size." Do not assume the pocket is rectangular or symmetrical.
When measuring depth, identify the starting plane, tool direction and internal contact point. The deepest point reached by a probe does not necessarily define the effective seating length or load-bearing contact.
Photograph visible steps, curves and asymmetric features. If internal geometry cannot be measured reliably with available tools, request a drawing comparison or sample evaluation. Width, height and depth alone cannot fully describe a complex connection.
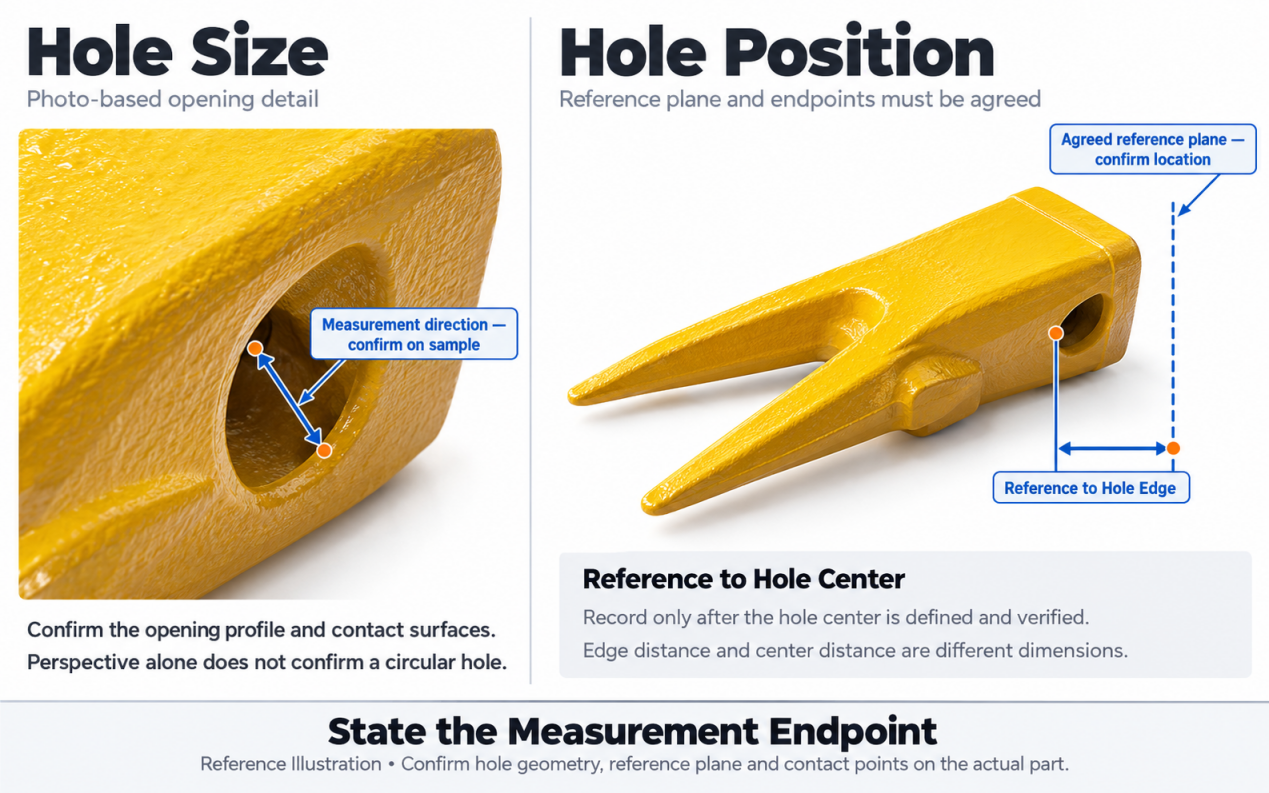
First identify whether the opening is round, elongated or another shape. A retainer recess should not automatically be recorded as a simple through-hole.
For an accessible round hole, measure the effective opening without including its entrance chamfer. For an elongated opening, record the long and short dimensions and their orientation. Mark worn or irregular holes clearly.
Next, record pin-hole position from the agreed reference. State whether the measurement ends at the near hole edge or the hole center. Those readings are different.
Only calculate a center position from an edge measurement when the hole geometry and measurement direction support that calculation. Do not apply a round-hole assumption to a worn or elongated opening.
Photograph the actual pin and retainer, including markings. Similar pin dimensions do not establish that locking components are interchangeable.
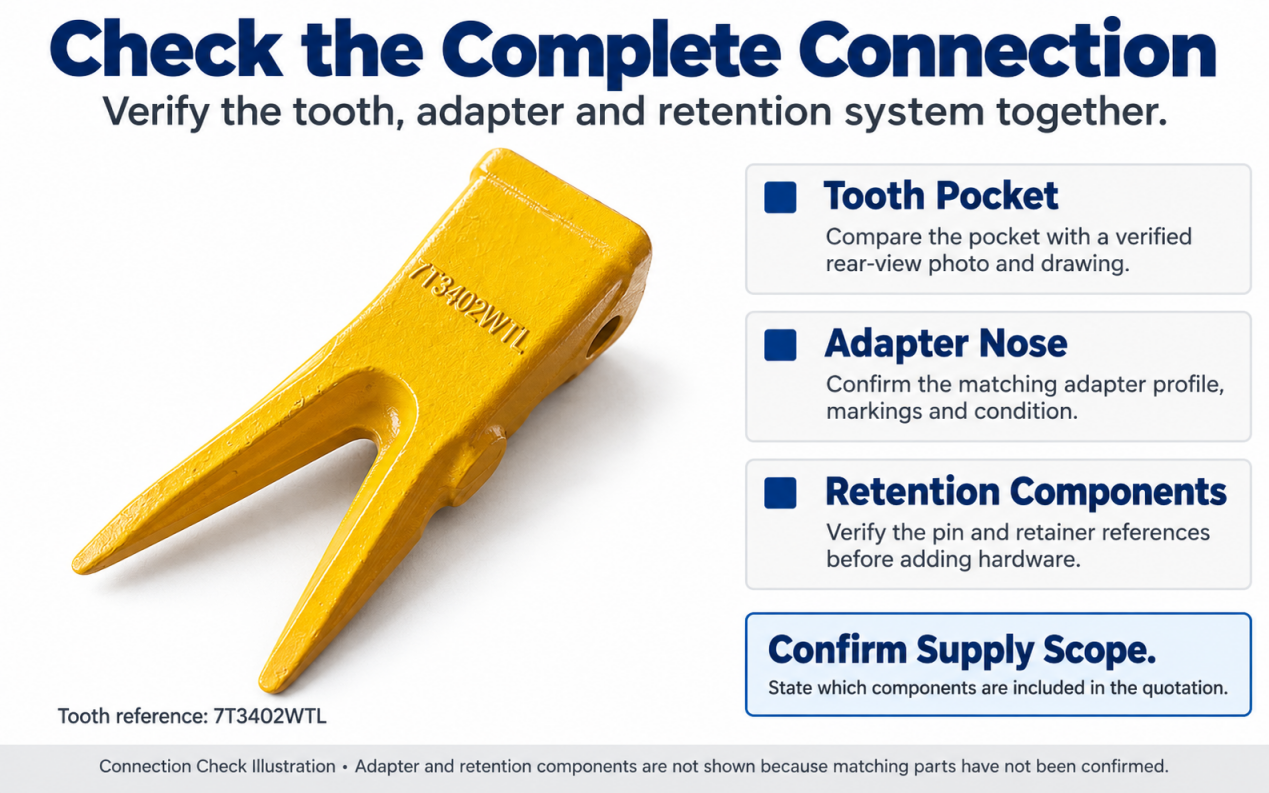
Overall length, rear external dimensions and tooth profile help distinguish candidates. Define the endpoints and whether length follows a chosen axis or another stated direction.
A worn tip cannot establish the original new-part length. Keep observed measurements separate from catalog dimensions.
Document the adapter nose, markings, locking features and visible damage. Do not assume tooth-pocket dimensions should equal adapter external dimensions: the intended fit depends on the specific system.
If dimensions conflict, first check reference points, tool position and sample condition. Acceptance tolerances must come from the applicable specification.
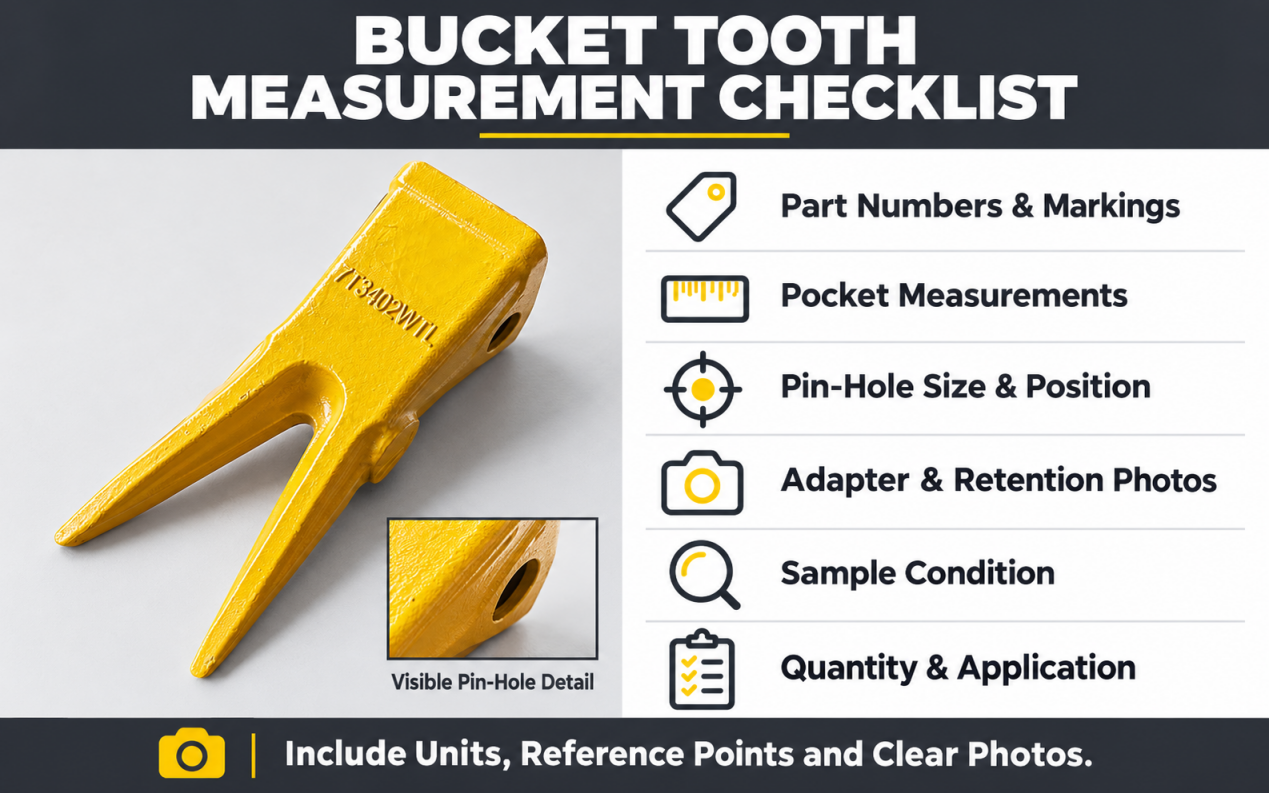
A clear record helps reduce repeated questions during quotation.
| Item | What to Record |
|---|---|
| Part identification | Tooth, adapter, pin and retainer markings, including suffixes |
| Sample condition | New, worn or repaired, with visible damage noted |
| Pocket width and height | Internal readings, section locations and measurement directions |
| Pocket depth | Starting plane, probe direction and internal contact point |
| Pin-hole size | Opening shape, dimensions and condition |
| Pin-hole position | Reference surface and whether the endpoint is the edge or center |
| Overall dimensions | Defined endpoints, measurement axis and sample condition |
| Adapter and retention details | Adapter nose, locking features, pin and retainer photographs |
| Supporting references | Applicable drawing, annotated photographs or confirmed sample |
| Units | Consistent units for every recorded dimension |
If a feature cannot be measured reliably, mark it as unconfirmed. A clearly identified gap is more useful than an estimated dimension presented as exact.
Send YASSIAN your tooth and adapter markings, clear photographs, pocket measurements, and pin-hole details. Include any available drawing, pin and retainer information, and your required quantity.
If the sample is worn or a reference point is unclear, highlight it in your notes so it can be reviewed during the fitment discussion.
Contact YASSIAN to discuss your bucket tooth replacement requirements and request a quotation.


